Diagnostic VS is a small free Android app that reads your console over MIDI and records what it sends when you move its controls. With your report we can make VS_Remote work properly with your model. It takes about 10–15 minutes.
Thanks to the reports sent with this app, VS_Remote already supports the VS-2480, VS-2000, VS-1880, VS-1824, VS-1680, VS-880EX and VS-R880. It is still useful for the VS-2400, VS-890, the original VS-880 and any other VS, and to send us a report from any model.
Don't use your personal phone as the bridge: leave one phone just for the VS. An old Android you no longer use is perfect, or a cheap used one. It only needs Android 8 or later and a USB-C port that works as host (OTG). No SIM card or accounts are needed, just WiFi.
The diagnostic only reads the console, the app has no Internet access and you can uninstall it afterwards.
The same parts you will later use with VS_Remote. Most Android phones support OTG; if yours does not detect the cable, check in Settings that OTG is on.
A cable with a USB plug on one end and two round 5-pin MIDI plugs (IN and OUT) on the other. Any generic “USB MIDI cable” that works without drivers (class compliant) is fine. Usually under USD 15.
The USB-MIDI cable has a normal USB-A plug. To connect it to the phone you need an OTG adapter: USB-C male to USB-A female (or micro-USB to USB-A on older phones).
A USB-C hub with a charging input keeps the phone charged while connected. Not needed for the diagnostic (about 15 minutes), but it is what we recommend for VS_Remote.
For the diagnostic only the phone is connected to the console, with a cable and no WiFi. VS Remote then adds the WiFi so tablets and phones can control the console: see how it connects.
Only once, on the console. These settings only change how it talks over MIDI: your songs and mix are not touched. Mixer Control Type: Excl (recommended) or C.C., never Off: with Off the console reports nothing from the mixer and the guided steps come out empty. The write tests put it back as it was.
| UTILITY → MIDI → MIDI OUT/THRU | Out |
| UTILITY → MIDI → SysEx.Rx Sw | On |
| UTILITY → MIDI → SysEx.Tx Sw | On |
| UTILITY → MIDI → MIXER CONTROL TYPE | Excl (recommended) or C.C., not Off: with Off the console reports nothing from the mixer |
| UTILITY → MIDI → MMC MODE | MASTER (for the transport step) |
| UTILITY → MIDI → DEVICE ID | Any (17 by default) — write it in the notes |
| UTILITY → SYNC → MIDI OUT SYNC Gen. | MTC (for the transport step) |
| UTILITY → SYSTEM → EXT LEVEL METER | MB24 (for the meters step) |
| MIDI PARAMETER → MIDI OUT/THRU | Out |
| MIDI PARAMETER → SysEx. Rx Sw | On |
| MIDI PARAMETER → SysEx. Tx Sw | On |
| MIDI PARAMETER → MIXER CONTROL TYPE | Excl (recommended) or C.C., not Off: with Off the console reports nothing from the mixer |
| MIDI PARAMETER → MMC MODE | MASTER (for the transport step) |
| MIDI PARAMETER → DEVICE ID | Any (17 by default) — write it in the notes |
| SYNC PARAMETER → MIDI OUT SYNC Gen. | MTC (for the transport step) |
MIDI PARAMETER: hold [SHIFT] and press F4 (UTIL), then F5 (MIDI) (press PAGE if MIDI is not shown). SYNC PARAMETER: from there, F6 (EXIT) and F6 (SYNC). The VS-2000 does not send meters over MIDI.
| SYS MIDI PRM → MIDIThr | Out |
| SYS MIDI PRM → SysEx.Rx / SysEx.Tx | On / On |
| SYS MIDI PRM → CtrType | Excl (recommended) or C.C., not Off: with Off the console reports nothing from the mixer |
| SYS MIDI PRM → MMC | MASTER (for the transport step) |
| SYS MIDI PRM → DevID | Any (17 by default) — write it in the notes |
| SYS Sync/Tempo → Gen. | MTC (for the transport step) |
Press [SYSTEM] several times until “SYS MIDI PRM ?” (or “SYS Sync/Tempo ?”) appears, press [YES], move with PARAMETER [▶▶] and change with the TIME/VALUE dial.
| SYSTEM → MIDI → MIDI Thru | OUT |
| SYSTEM → MIDI → SysEx.Rx | On |
| SYSTEM → MIDI → SysEx.Tx | On |
| SYSTEM → MIDI → Control Type | Excl (recommended) or C.C., not Off: with Off the console reports nothing from the mixer |
| SYSTEM → MIDI → MMC Mode | MASTER (for the transport step) |
| SYSTEM → MIDI → Device ID | Any (17 by default) — write it in the notes |
| SYSTEM → MIDI → MIDI Model ID | VS-1880 |
| [SHIFT] + [EXT SYNC] → Sync Gen. | MTC (for the transport step) |
SYSTEM menu: [SHIFT] + [F5 (SYSTEM)], then [F4 (MIDI)].
| SYSTEM → MIDI → MIDI Thru | OUT |
| SYSTEM → MIDI → SysEx.Rx | On |
| SYSTEM → MIDI → SysEx.Tx | On |
| SYSTEM → MIDI → Control Type | Excl (recommended) or C.C., not Off: with Off the console reports nothing from the mixer |
| SYSTEM → MIDI → MMC Mode | MASTER (for the transport step) |
| SYSTEM → MIDI → Device ID | Any (17 by default) — write it in the notes |
| SYSTEM → MIDI → MIDI Model ID | VS-1880 (with VS-1680, tracks 17-18 are not reported) |
| [SHIFT] + [EXT SYNC] → Sync Gen. | MTC (for the transport step) |
| SYSTEM → MIDI → MIDI Thru | OUT |
| SYSTEM → MIDI → SysEx.Rx | On |
| SYSTEM → MIDI → SysEx.Tx | On |
| SYSTEM → MIDI → Control Type | Excl (recommended) or C.C., not Off: with Off the console reports nothing from the mixer |
| SYSTEM → MIDI → MMC Mode | MASTER (for the transport step) |
| SYSTEM → MIDI → Device ID | Any (17 by default) — write it in the notes |
| [SHIFT] + [EXT SYNC] → Sync Gen. | MTC (for the transport step) |
SYSTEM menu: [SHIFT] + [F5 (SYSTEM)], then [F4 (MIDI)].
| MIDI menu (SYSTEM or UTILITY) → MIDI OUT / THRU | Out (not Thru) |
| MIDI menu → System Exclusive Rx / Tx | On / On |
| MIDI menu → Mixer Control Type | Excl (recommended) or C.C., not Off: with Off the console reports nothing from the mixer |
| MIDI menu → Device ID | Write it in the notes |
| Sync menu → MIDI sync output | MTC, if your console has it |
Names vary between models: look for them in the MIDI chapter of your Owner's Manual.
The same table is inside the app (“How to set up the console”).
Download the APK on the phone and open it. Android will ask you to allow installing apps from this source (your browser or file manager): allow it and install. If Play Protect warns you, tap Install anyway. If something goes wrong, see Installing.
OTG adapter + USB-MIDI cable to the phone; MIDI plugs crossed: adapter OUT → console MIDI IN, adapter IN → console MIDI OUT. On the console: MIDI OUT = Out (not Thru) and SysEx Rx/Tx = On (table for each model).
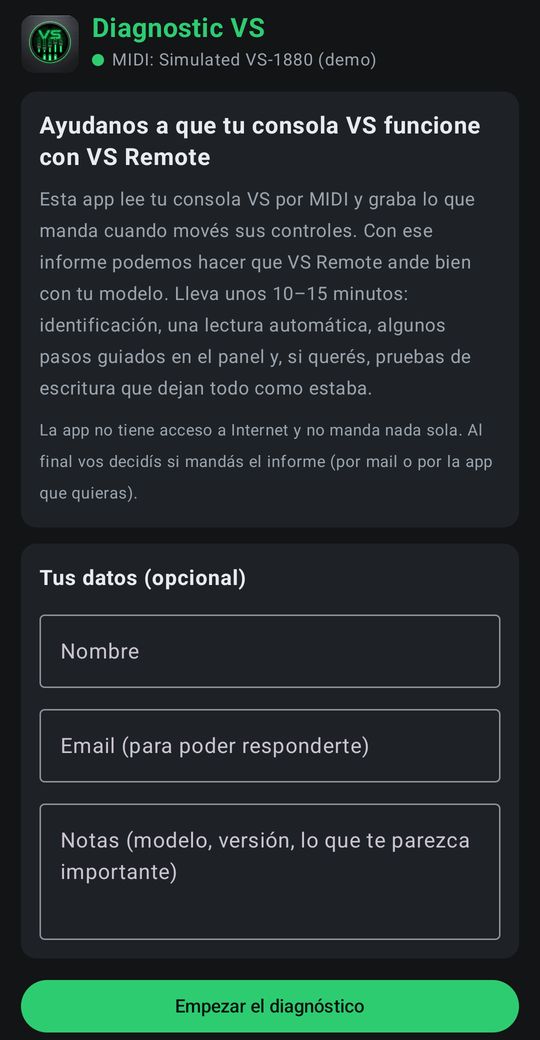
The app identifies the console (if it can't, it asks you to choose the model), reads it, guides you through a few movements on the panel and, if you want, runs write tests.
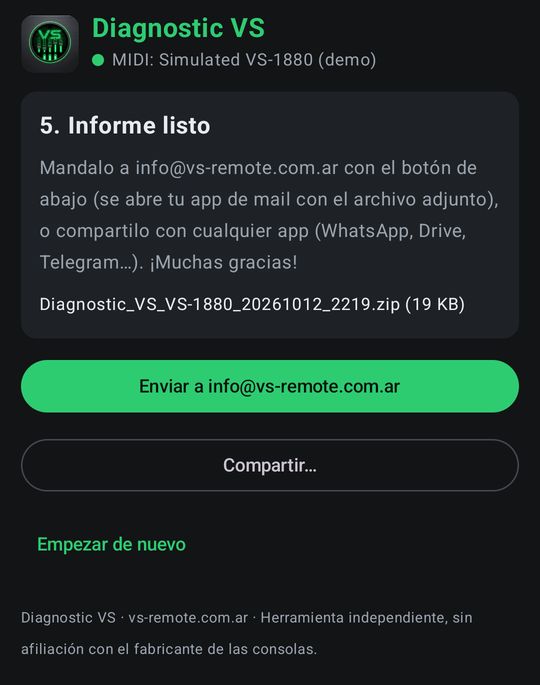
At the end tap Send to info@vs-remote.com.ar: your email app opens with the report attached. You can also share it by WhatsApp, Drive or any app.
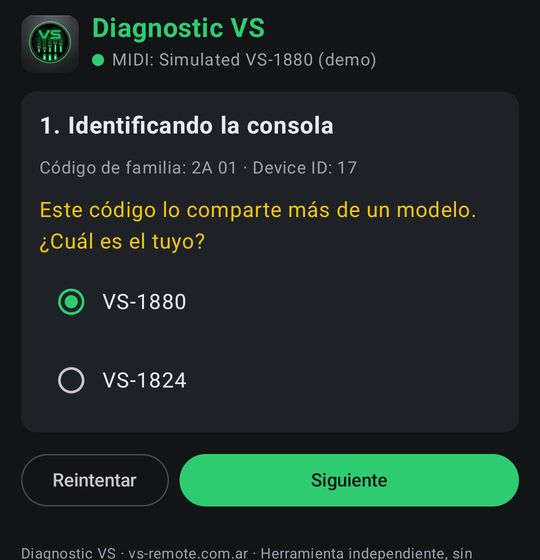
Asks the console who it is (model family, Device ID) and which Model IDs it answers. If two models share the same code, or the console is not known, you choose it.
Reads its MIDI settings, the whole mixer, the current song and the song list, and compares them with what the manuals say. Nothing is changed.
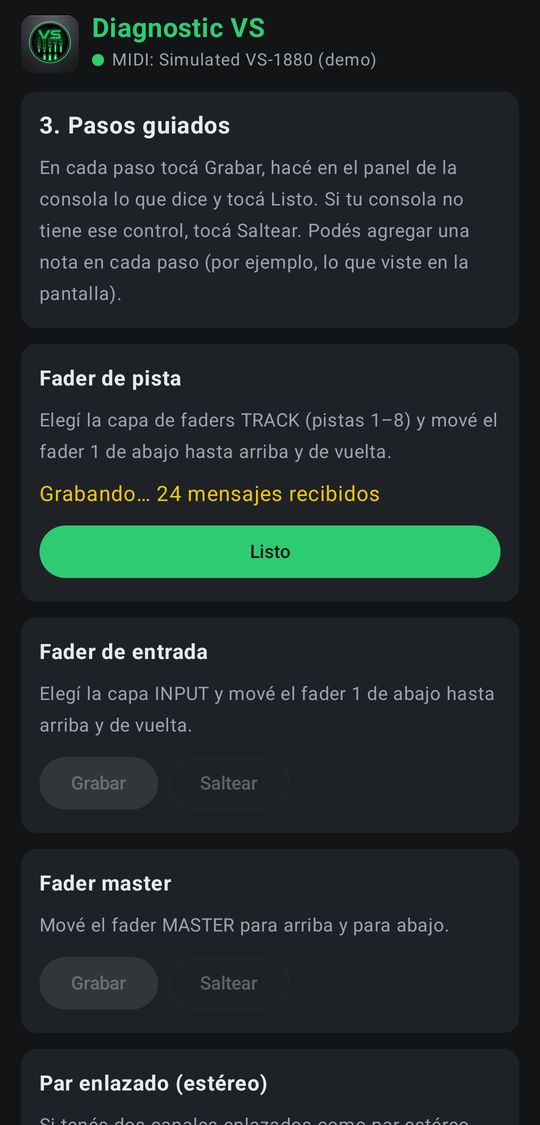
You move faders, pans, status, mute, EQ, transport and scenes on the panel, and the app records exactly which MIDI messages come out.
Changes a few values of track 1, input 1 and the master, reads them back and puts each one back. With the console stopped and a test song.
A small .zip (tens of KB): a readable summary, the full results and the raw MIDI log with times. Plus the phone model and what you write in the optional fields.
We compare your report with the map of your model and fix what does not match. We write back to tell you when VS_Remote supports your console. Thank you!
Diagnostic VS is installed as an APK, outside Google Play, so Android checks it more. These are the cases we have seen and what to do in each one. Installing it does not change VS Remote or anything else on the phone, and you can uninstall it afterwards.
1. Download the APK on the phone, with Chrome or your usual browser.
2. Open it from Downloads or My Files (not from the WhatsApp, Telegram or Drive preview, which sometimes freezes).
3. If asked, allow that app to install unknown apps and go back.
4. Tap Install. If Play Protect warns you: More details → Install anyway; if it asks to send the app for scanning, choose Don't send.
It is Play Protect waiting to scan the app on the Internet: on a phone with no Internet (a dedicated phone on the studio Wi-Fi, no SIM) the scan never finishes.
1. Settings → Apps → filter → show system apps → Package installer → Force stop, and in Storage Clear cache. If it is still stuck, restart the phone.
2. Install again with Internet (a Wi-Fi with Internet or another phone's hotspot), or use the next card.
Turn off the Play Protect scan for a moment: Play Store → your photo → Play Protect → gear icon (top right) → turn off Scan apps with Play Protect. Install the APK and then turn it back on.
Play Protect does not know apps that are not on Google Play, so it may call it unsafe. Diagnostic VS has no Internet permission and only talks MIDI with the console. Tap More details → Install anyway, or turn the scan off for a moment as in the previous card.
Samsung (One UI 6 or newer): Auto Blocker blocks every app that is not from a store. Settings → Security and privacy → Auto Blocker → off while you install, then on again.
• Another version of Diagnostic VS is already installed: uninstall it and install the new one (VS Remote is a different app and is not touched).
• The download was cut: delete the file and download it again from the browser.
• Android 8 or newer is needed, and about 50 MB free.
1. On the phone: Settings → About phone → Software information → tap Build number 7 times; then Developer options → USB debugging on.
2. Connect the phone to the computer with a USB cable and accept the prompt.
3. With Android Platform Tools installed: adb install -r Diagnostic_VS.apk. This skips the phone installer completely.